Click on our menu buttons immediately below to find MegaSquirt® information quickly:
MicroSquirt® Module
V1/V2 MicroSquirt®
Important Safety Information
MicroSquirt® Support Forum
- MShift™ TCU
- MShift™ Intro
- GPIO Build Guide for 4L60E
- Base circuits
- GPO1, GPO2, GPO3,
GPO4 (gear LEDs)
- VB1, VB2, VB3, VB4
- PWM1, PWM2, PWM3, PWM4
- GPI1, GPI2, GPI5
(2/4WD, Input2, downshift)
- GPI3 (Temperature)
- GPI4 (Brake sense)
- EGT1, EGT2, EGT3,
EGT4 (non-CAN Load, line pressure, Input3, Input1)
- VR1 (Vehicle
Speed Sensor)
- VR2 (Upshift button)
- Finishing Touches
- Testing your
GPIO Board
- External Wiring Guide for 4L60E
- Current Release Code
- User Settings
- βeta Code
- Code Archives
- Purchase a
GPIO kit
- Working with the Shift Table
- Serial
Connection Troubleshooting
- CANbus
Set-Up
- Solving VSS
Issues
- Ports, pins, circuits, connections
- MShift™ Discussion
Forums
- Misc. MShift™
Topics
- MShift™ sitemap
- Template Project Code
- GPIO Board Intro
- MShift™/GPIO
Support Forum
|
V3 MicroSquirt® - QuickStart Guide
Mounting Your MicroSquirt® Controller
Your MicroSquirt® EFI controller should be mounted in a cool, dry location. The electronic components cannot withstand temperatures over 185°F (85°C), and will last longer if kept cooler. DO NOT install your MicroSquirt® controller under the hood of your vehicle.
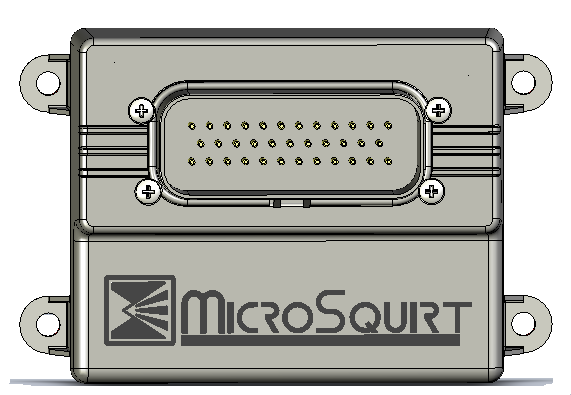
The overall length of your MicroSquirt® EFI controller enclosure, including mounting tabs, is 4.71" (120mm). The case width is 3.13" (79.5mm) and the height is 1.67" (42.4mm) to the top of the Ampseal connector (not including the harness and its connector).
The dimensions of the mounting hole pattern are 4.20" by 2.14" (107 x 54mm). These are center to center hole spacings. The hole diameters are 0.20".
Sealing your MicroSquirt® controller
Your MicroSquirt® EFI controller enclosure is 'water resistant'. The enclosure can be fully sealed by using sealer (silicon or similar) between the top and bottom sections of the case. The Ampseal connector already is sealed with its own gasket so just sealing the top/bottom case sections will seal it.
Separate the case halves by removing the four (4) Phillips screws from the bottom side of the controller and gently prying the case apart. Then apply a sealer to the edges of the upper part of the case. Take care not to get excess sealer on the PCB or its electronic components. Then reassemble the case. It will be sealed once the sealer sets up.
If you have any questions or problems that can't be answered from the links above, or a search the MicroSquirt® manual:
you can ask questions at the MicroSquirt® support forum which is at: www.microsquirt.com Click the links for more information.
MegaSquirt® and MicroSquirt® controllers are experimental devices intended for educational purposes.
MegaSquirt® and MicroSquirt® controllers are not for sale or use on pollution controlled vehicles. Check the laws that apply in your locality to determine if using a MicroSquirt® or MicroSquirt® controller is legal for your application.
©2011 Bruce Bowling and Al Grippo. All rights reserved. MegaSquirt® and MicroSquirt® are registered trademarks. This document is solely for the support of V3 MicroSquirt® boards from Bowling and Grippo.